Best Apricot Jam
Homemade jellies, jams, and preserves are absolutely delicious. There is no substitute when it comes to anything well made in the comfort of your own home. And what’s even better is when you use home grown fruits to make your jellies, jam, or preserves. So, we are going to be sharing with you all our favorite recipe for homemade Apricot Jam with a hint of Apple for one of the best Apricot Jam you have ever tasted.

A Recipe from Our Family to Yours
Here is a simple, but delicious family recipe made in a copper pot, so there is no need for adding pectin, the copper does a wonderful job of thickening jams, jellies, and preserves very nicely on its own.
If you find yourself at a loss for what to do on a quiet Sunday afternoon, then, adding jam making to the list of hobbies or activities you engage in is a sure fire way to make good use of your time and you get the added bonus of enjoying the fruits of your labor (pun intended) throughout your work week.

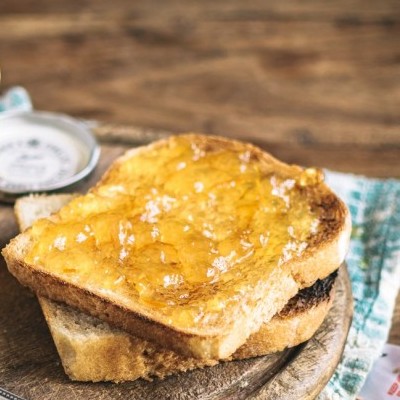
Oh the Ways to Enjoy Homemade Jam!
We make use of the jams and jellies we cook by enjoying them on English Muffins for breakfast, as well as, the occasional substitute on our dinner rolls and or biscuits for a lovely sweet treat in place of dessert.


There is no greater reward than having the ability to grow and or make your own food.
Give this wonderful recipe a try and let us know how it works for you. We would love to hear from you, so feel free to leave us a comment in the comment section below.It is a simple recipe with easy to find ingredients (most of which you may already have in your fridge or pantry), but quite tasty and we know you will love it too.
Ingredients:
3 Cups Apricot (finely chopped)
1 Cup Apple (blended – pureed)
3 3/4 cups Raw Cane Sugar
1/4 cup orange juice
1 Tbsp Lemon Juice (Optional)
Directions:
1. Place all ingredients into your copper pot.
2. Bring the ingredients to a boil.
3. Once you have a rolling boil, stir the contents constantly to avoid boiling over.
4. After about 10 to 12 minutes turn off the heat and let the mixture cool.
5. Mixture will thicken slightly.
6. Once completely cool spoon ingredients into sterilized jars and place sterilized lids on.
7. Once all jars are filled and lids tightened, flip the jars upside down and let them stay that way for five to ten minutes (preferably ten minutes). This should help form a good seal and limit the possibility of spoilage, thereby extending the shelf life of your delicious homemade jam.
8. Enjoy on toast or food of your choice. Product should last for 2 to 3 month and even longer depending on steps taken to preserve your jam.
Tip: You can easily convert this recipe to Apricot jelly by straining out fruit pulp or simply using the juices of the fruits required for this recipe as a substitute for the whole fruits. You will need to use some pectin if you are not using a copper pot.